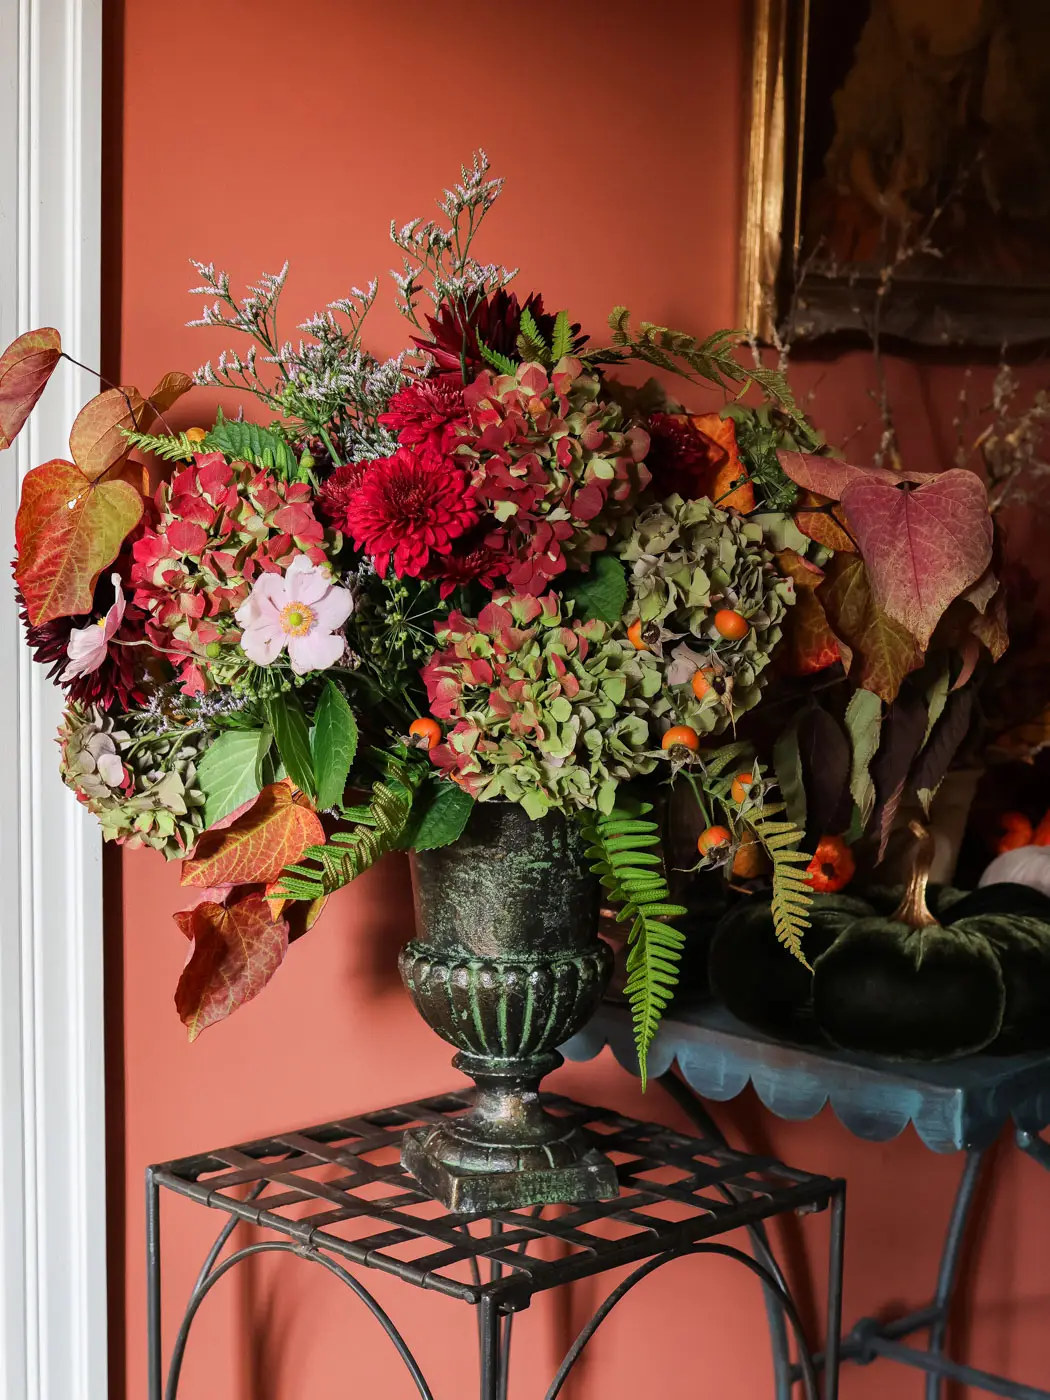
There are years when Nature is particularly generous: when the weather feels just right, the flowers keep blooming a little longer, and the foliage slowly begins to take on those vibrant autumn shades. I love observing these quiet cycles: some elements slip away without a sound, while others take the lead for a final burst of splendour, glowing brightly before retreating gently with the arrival of winter. Autumn is a very special season for me, one that makes me want to spend as much time as possible outdoors, yet also enjoy a cosy, comforting atmosphere at home.
Even if I tend to slow down a little in summer and sometimes lose motivation for a while, early autumn always brings me a renewed sense of energy and inspires me to start (or continue) creative projects.
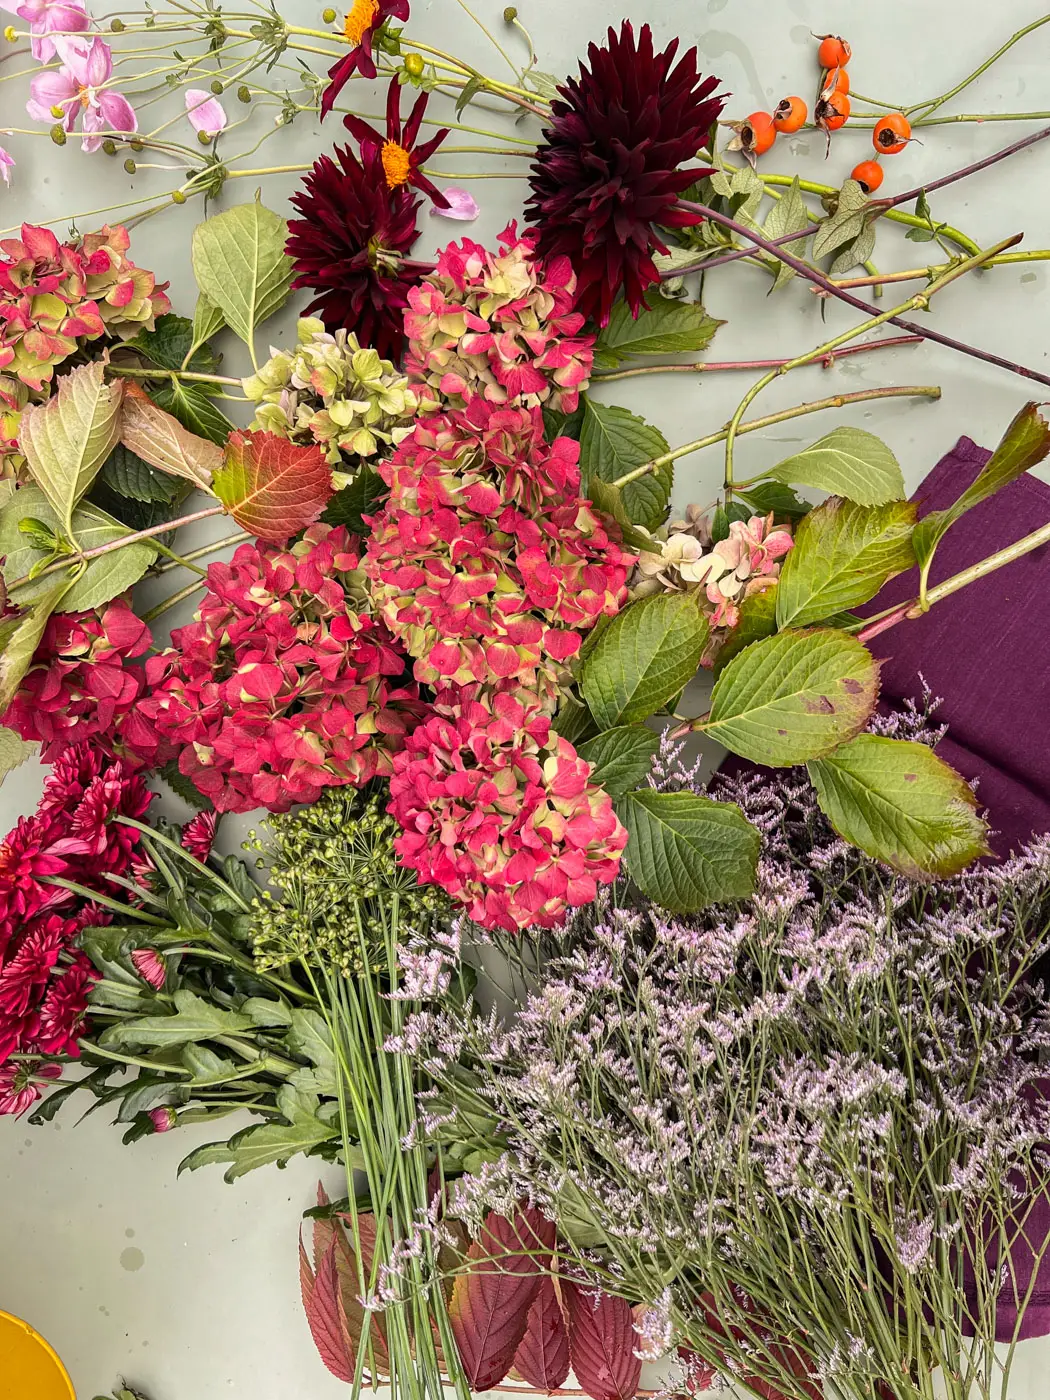
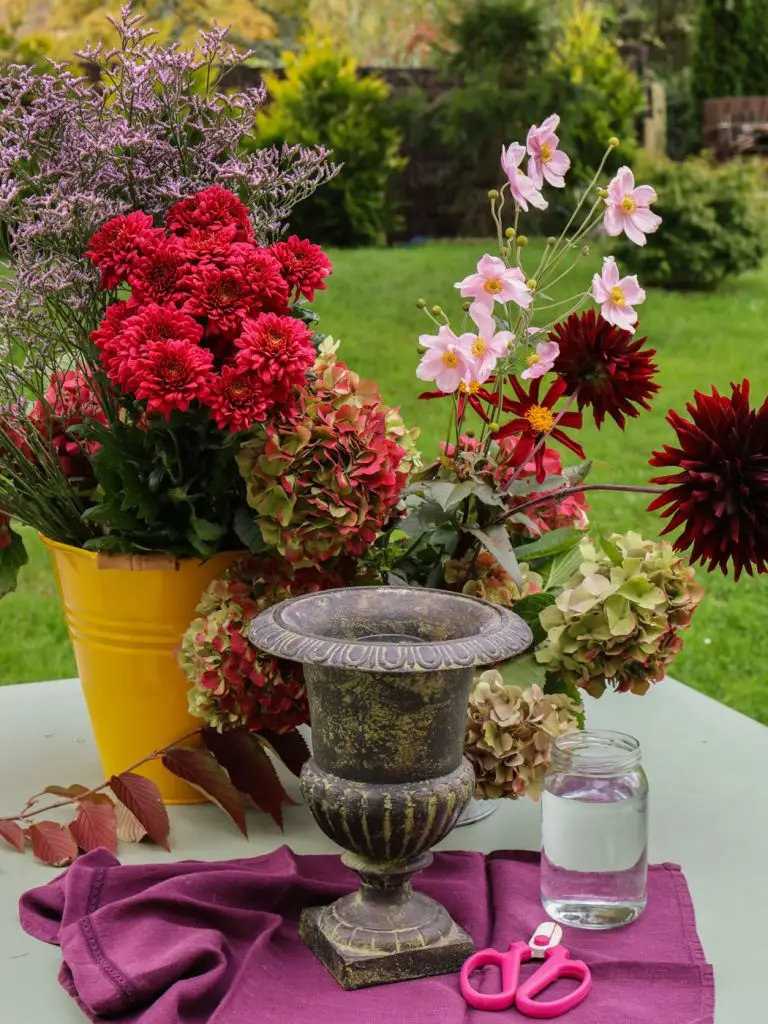
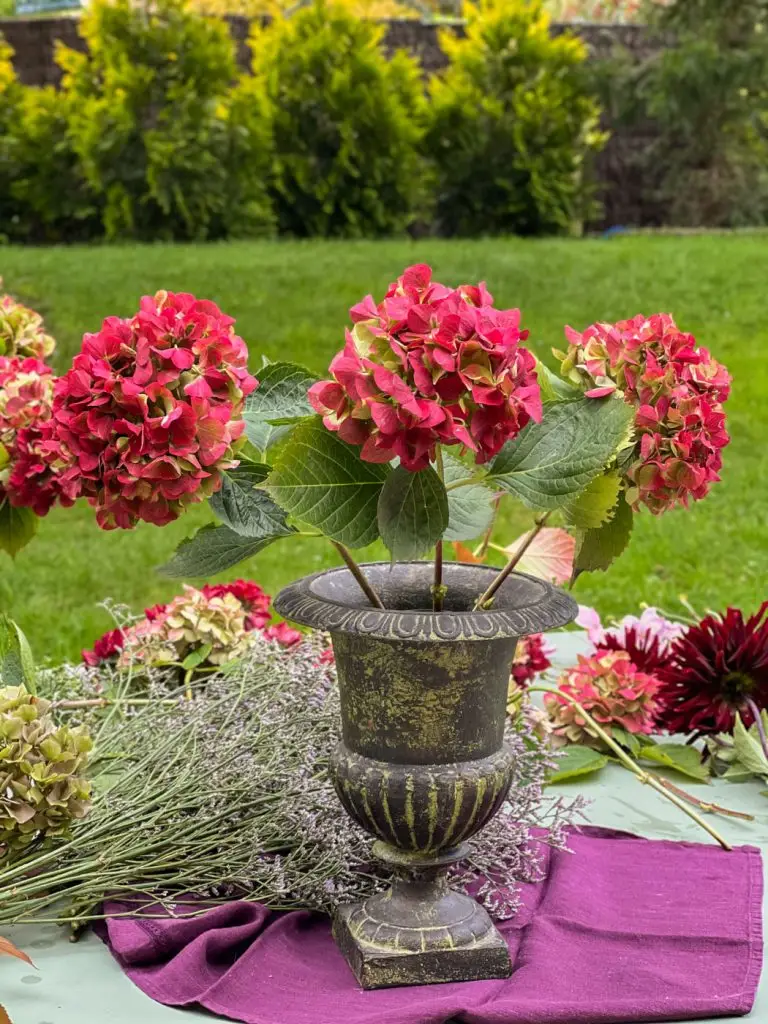
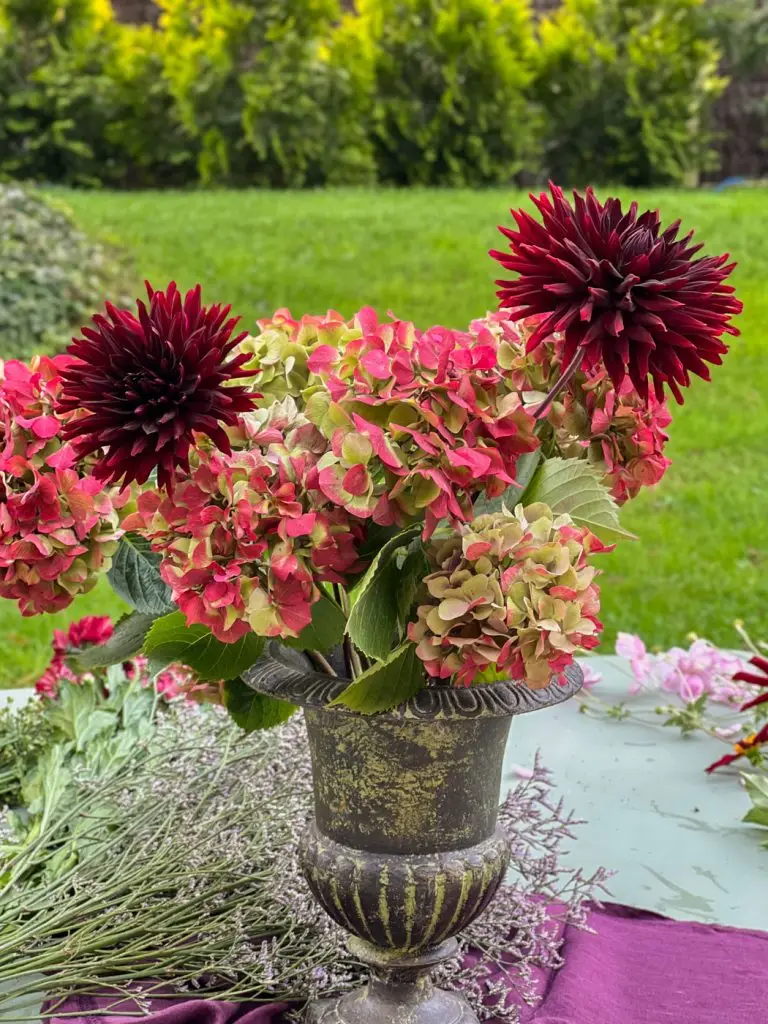
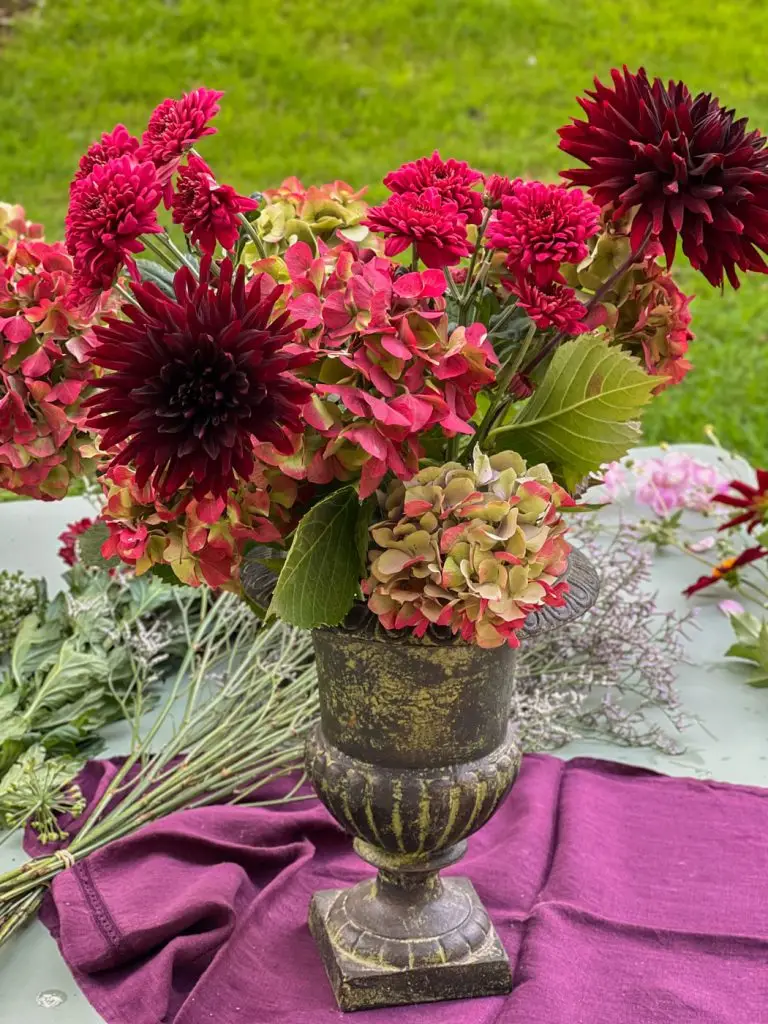
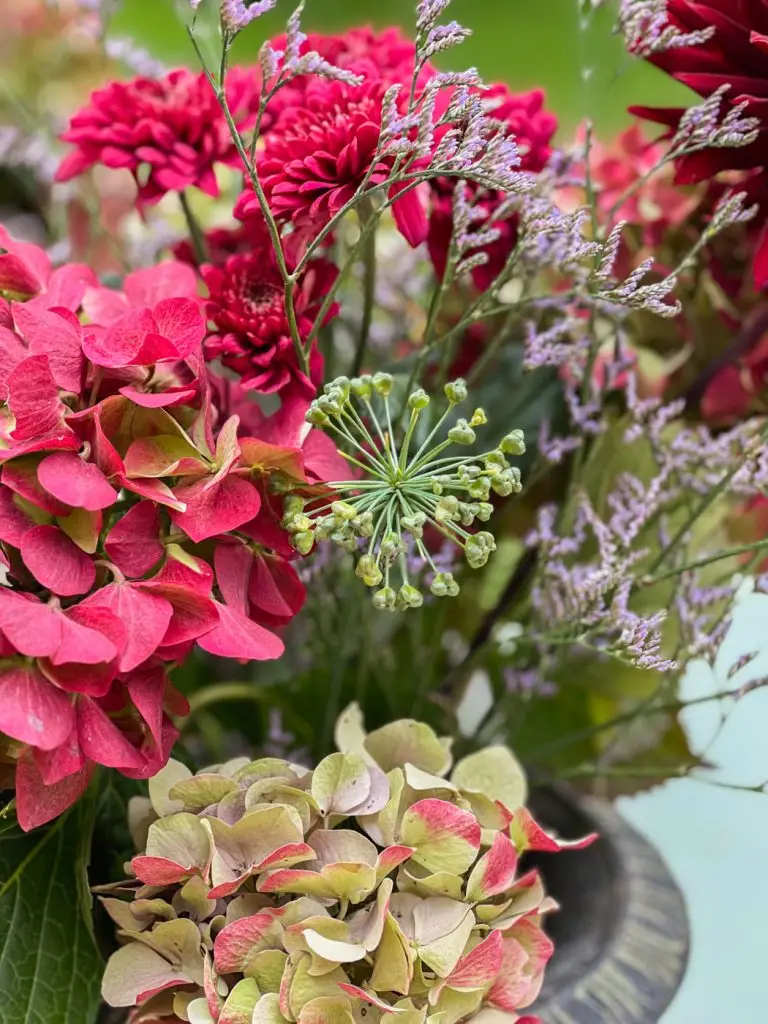
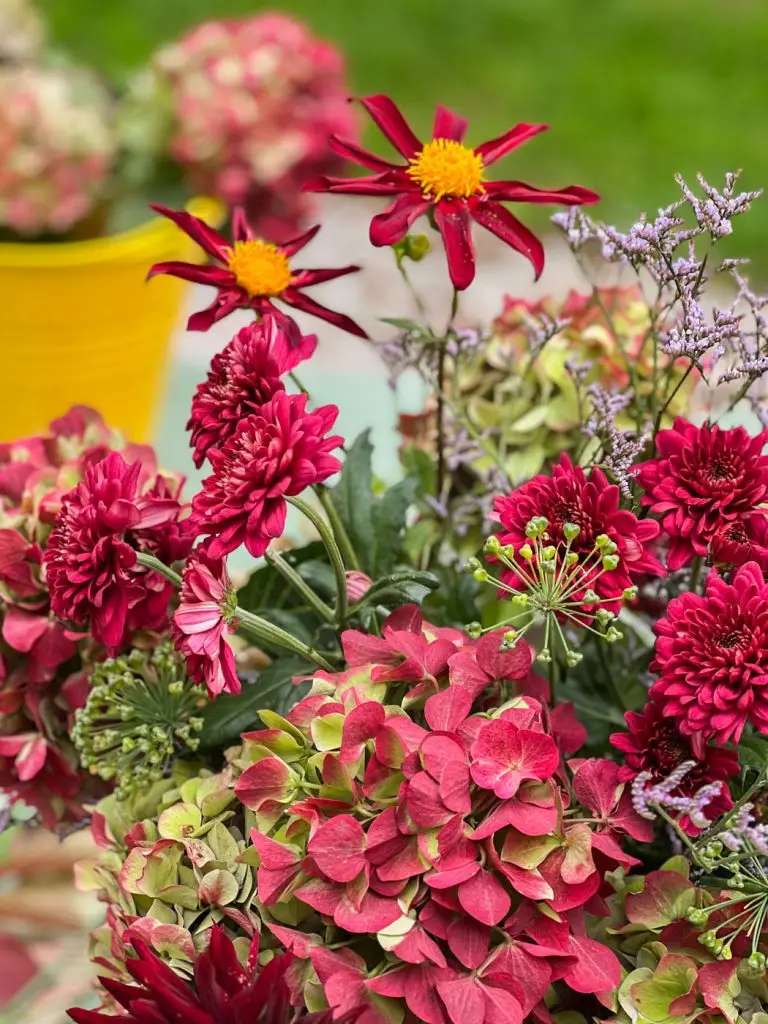
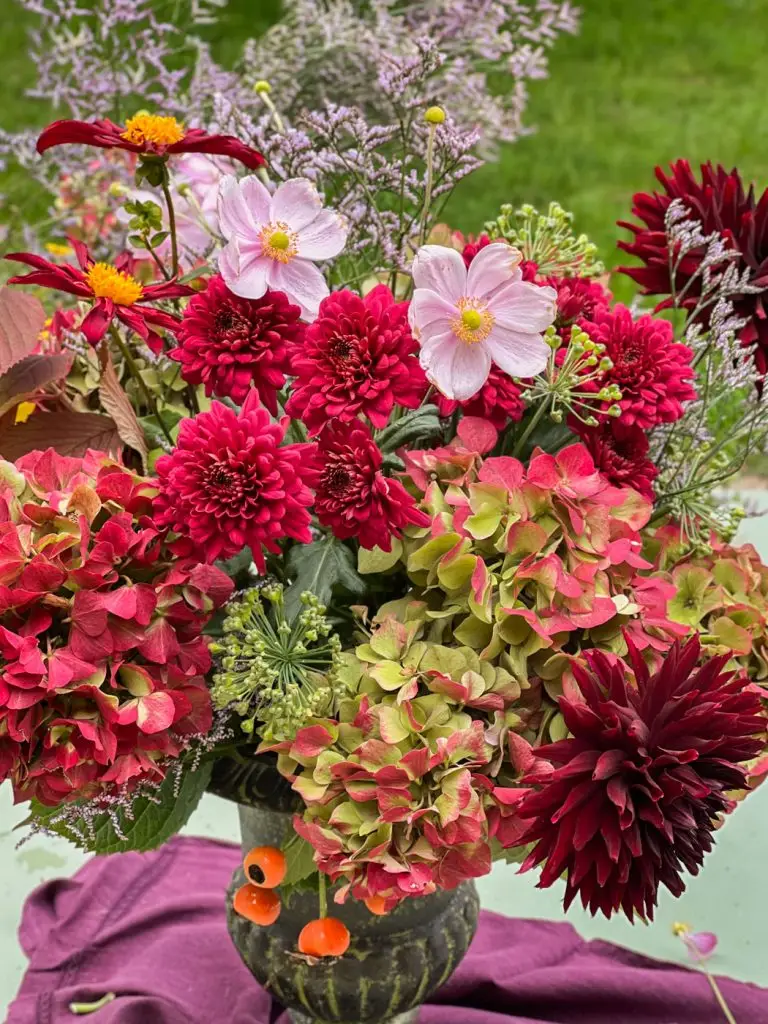
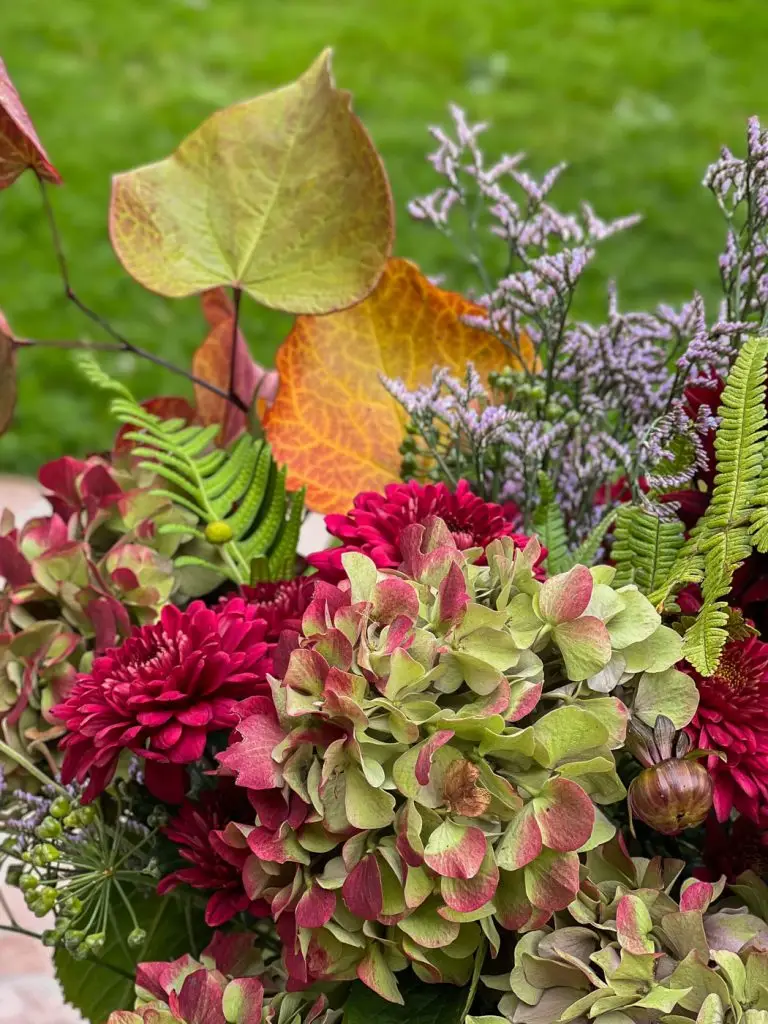
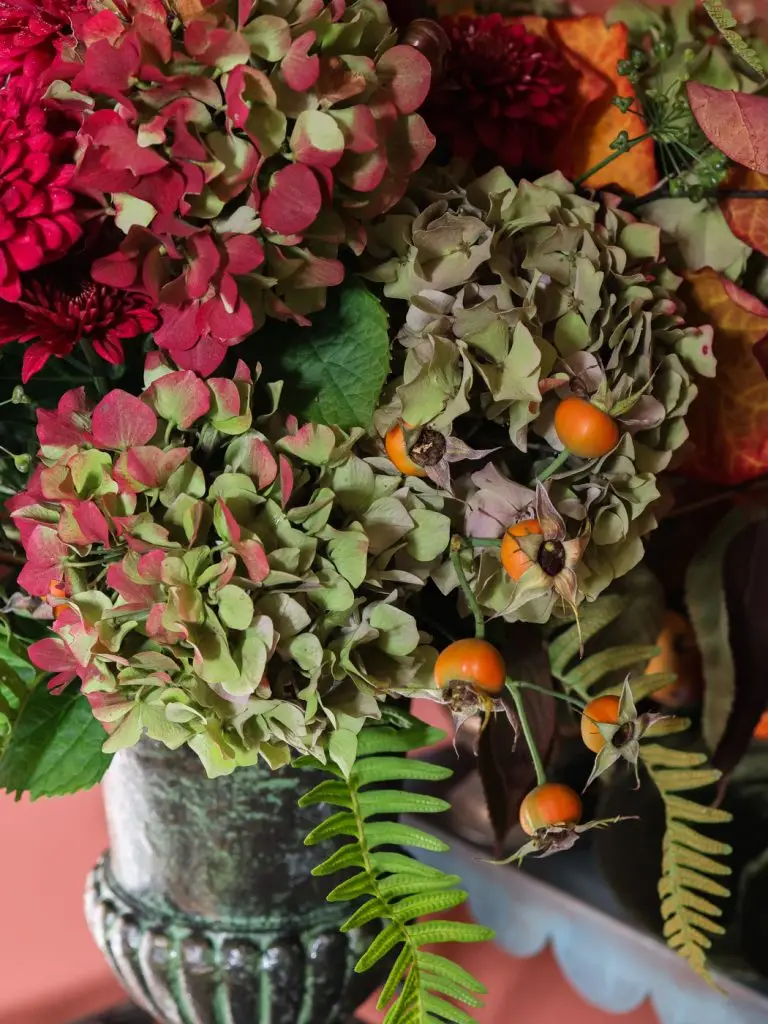
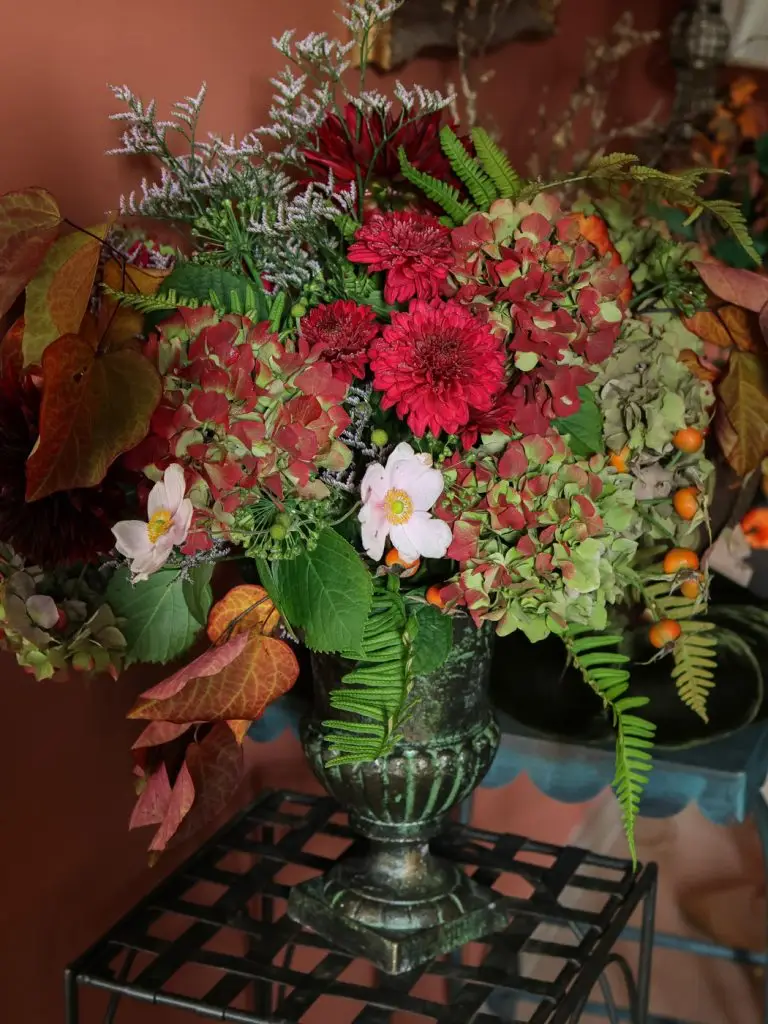
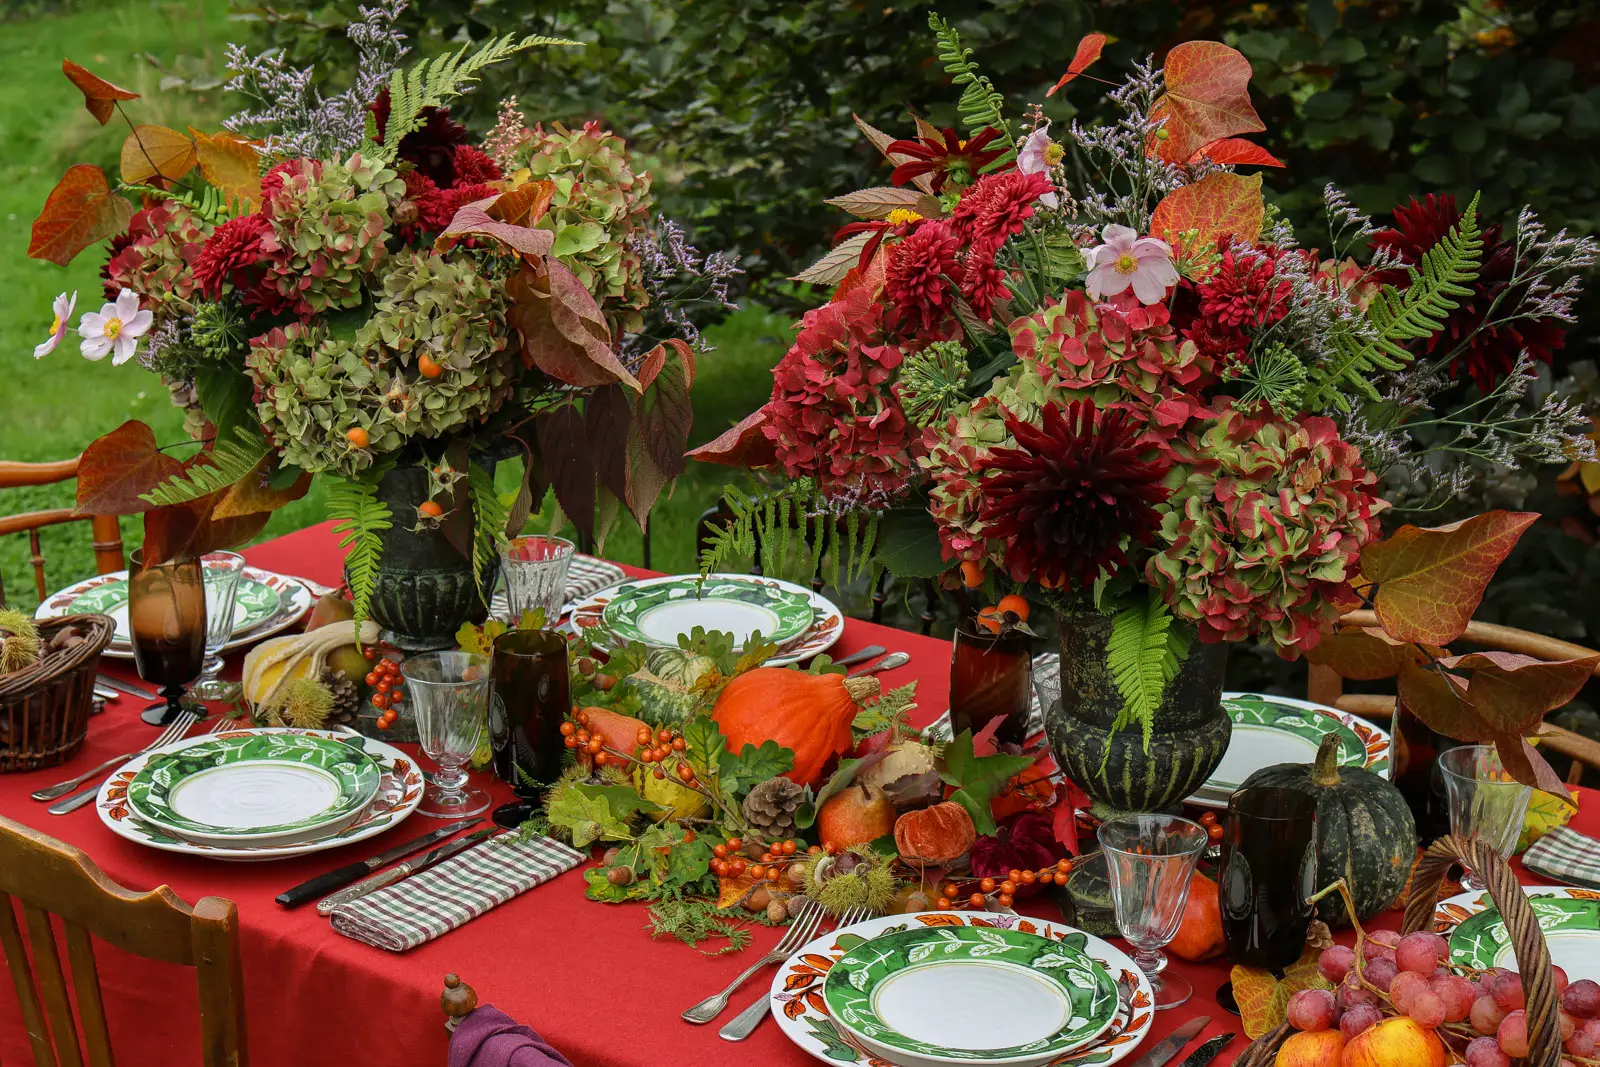
I have a few little rituals at this time of year, such as making a large autumn bouquet (or a wreath) – like this one – with deep, dramatic tones. It’s almost too lavish for a table, but it is the season of abundance after all, so I made two at once to decorate a dinner setting. And once I get started, it can be hard to stop…
Flowers and foliage used
- Hydrangeas
- Dahlias Honka Verrone’s Obsidian + Black Jack
- Red chrysanthemums (Chrysanthemum x indicum ‘Herbstrubin’)
- Limonium
- Ornamental allium
- Rose hips
- Japanese anemones (pink)
- Branches of Quercus canadensis ‘Forest Pansy’
- Ferns
The lovely part is that this type of bouquet can then be displayed elsewhere in the house, in a spot where you’ll keep noticing it day after day. And this one can even be kept much longer, as it dries beautifully. All I have to do later on is remove a few elements and it gets a second life.
Step 1
Before I begin arranging a bouquet – no matter its size – I like to prepare everything in advance. It makes the whole process much easier, saves time, and prevents that moment where you feel overwhelmed in a charming but rather impractical tangle of stems and foliage.
Once I’ve cut my flowers and branches, I immediately place them in a bucket of water.
Then I prepare my Médicis vase (which you’ve probably seen me use in other tutorials) and the glass container that will sit inside it. There are two reasons for this: first, it helps keep the bouquet stable; and second, the Médicis vase itself isn’t designed to hold water.
This is also the moment to remove any leaves or extra foliage from the lower part of the stems – no leaf should ever sit in the water if you want your arrangement to last as long as possible.
Step 2
I begin with the most imposing flowers – those that are a little like the main characters of the story. I place four heads in a cross pattern. I chose blooms with a slight green undertone to bring a more interesting nuance to the arrangement.
Step 3
Next, I add my two ‘Black Jack’ dahlias, letting them extend slightly on either side to create height differences and give the bouquet more volume. It will fill out easily later on with the rest of the elements.
Step 4
Then come the red chrysanthemums, which have such a bold, vibrant colour, and bring a wonderful energising accent. I already love, at this stage, watching the different shades of red and garnet come together, as well as the various petal textures unfolding before me.
Step 5
Now it’s time for the secondary foliage: the light, airy limonium, and the ornamental allium which adds brightness and softness with its delicate green spheres. I tuck them throughout the bouquet, gently, but not too many at once, as there are still more accents to come.
Step 6
I usually save my pink ‘Honka’ dahlias for the end because their petals are very delicate and can fall easily when handled. But they are so elegant and sculptural that I can hardly imagine a bouquet without them. They also exist in deep, velvety tones, which make for a striking contrast.
Step 7
I add a few pink Japanese anemones but they have to be handled gently, as they are quite fragile.
Step 8
Then I place a few branches of Quercus canadensis, whose heart-shaped leaves are especially charming and already dressed in their early autumn colours. I complete the structure with ferns, both for lightness and graphic movement. I like to let them emerge at the top, but also cascade slightly from the base of the bouquet.
Étape 9
Finally, I add the bright orange rose hips, which I often use in autumn wreaths, letting them trail softly along the vase like a little waterfall of colour.
As I mentioned earlier, I made two identical bouquets to decorate a table. They are, of course, rather large as the idea is to remove them once guests are seated, and place them on small side tables to create a beautiful atmosphere. You can even set little lanterns at their base for a truly magical look. Or, if you are planning a buffet, I recommend displaying them on a large rectangular table like this one, with the dishes arranged in front, in the spirit of a grand autumn banquet.


